
サーバのcertwatchからサーバ証明書の有効期限が迫っているよとうお知らせメールが届くようになって2週間ほど過ぎた。残り14日となった。そこで、対応をしてみた。
The certificate for www.shigizemi.com will expire in 14 days
########### SSL Certificate Warning ################
Certificate for hostname ‘www.shigizemi.com’, in file (or by nickname): /etc/pki/tls/certs/2015s-zemi-crt.pem The certificate needs to be renewed; this can be done using the ‘genkey’ program. Browsers will not be able to correctly connect to this web site using SSL until the certificate is renewed.
######################################## Generated by certwatch(1)
www.shigizemi.comのサーバ証明はRapid-SSLを利用している。更新料は年額4,300円です。手続きは公開鍵や秘密鍵を自分で作ってそれをサーバ証明書を発行してくれる事業者にアップして、審査を受けて発行されて戻ってきたサーバ証明書や中間証明書をインストールするという手順です。ちょっと、面倒です。
しかし、去年暮れからサービスが始まった無料のサーバ証明書発行、Let’s Encryptはほぼ全自動というスグレモノ、さらに無料である。これを試さない手はないですね。
Let’s Encryptはモジラ財団やアカマイ、グーグル、シスコ、フェイスブックなどがスポンサーとなっている米国カリフォルニア公益財団法人であるISRGが運営しているopen certificate authority (CA)である。
https://letsencrypt.org/
ただし、無料なのでドメイン認証(DV)によるサーバ証明書である。まぁ、暗号化通信をhttpsで実現するだけならこれで十分です。(もし、商品の売買などクレジットカードなどの情報を扱うのならEV証明書が必要。)
さて、それでは手順を紹介していきます。
【前提条件】
- サーバOSは、CentOS6.7 webサーバはApache2.2.15
- python2.6インストール済み(2.7に更新予定)
- すでにSSLで運用済み(open-ssl関連インストール済み)
- バーチャルホストで運用(CMSにWordpressを利用)
- インストール、設定作業はroot権限で実行
<手順>
- python2.6を2.7にアップデート
- letsencryptクライアントをインストール
- ssl_confファイルの設定
- letsencryptの自動更新設定
- (番外)virtualenvをpython2.7に
1.python2.6を2.7にアップデート
まず、普通にletsencryptクライアントをインストールすると、エラー?警告が発生!(何も考えずにletsencryptをインストールしてしまった…しくじり)
# ./letsencrypt-auto --help
WARNING: Python 2.6 support is very experimental at present... if you would like to
 work on improving it,
please ensure you have backups and then run this script again with the --debug flag!
# ./letsencrypt-auto --help --debug
Creating virtual environment... ./letsencrypt-auto: line 167: virtualenv:
コマンドが見つかりません
Python2.6は実験的…とかvirtualenvコマンドが見つからん…とか。
無視してインストールを続けていくと、どうもPython2.6ではちょっと無理っぽい。2.7に更新しなさいというメッセージが表示されました。
(1) Python2.7.9とPython3.5.1をダウンロード
どうせなら、最新のものを入れようと現時点で一番新しいものをダウンロードしてきました。
※後述にあるように、トラブルの原因となったのでPython3.5.1はインストールしないほうがいいです。
<<参考にしたサイト>>
http://qiita.com/a_yasui/items/5f453297855791ed648d
インストールディレクトリはどこでもいいが、/usr/localとした。
まず、インストールに必要なツール群をインストール。
# yum groupinstall “Development tools”
# yum install zlib-devel bzip2-devel openssl-devel ncurses-devel sqlite-devel readline-devel tk-devel
ダウンロード
# cd /usr/local/src
# curl -O https://www.python.org/ftp/python/3.5.1/Python-3.5.1.tgz
# curl -O https://www.python.org/ftp/python/2.7.9/Python-2.7.9.tgz
# tar zxf Python-3.5.1.tgz
# tar zxf Python-2.7.9.tgz
(2) Python-2.7.9インストール
#cd ./Python-2.7.9
# ./configure --with-threads --enable-shared --prefix=/usr/local
# make
(デフォルトでPython2.7が起動されるようにする設定のため、–enable-sharedを指定)
$ vi ./Modules/Setup
# Socket module helper for SSL support; you must comment out the other
# socket line above, and possibly edit the SSL variable:
#SSL=/usr/local/ssl
#_ssl _ssl.c \
#-DUSE_SSL -I$(SSL)/include -I$(SSL)/include/openssl \
#-L$(SSL)/lib -lssl -lcrypto
↓
SSL=/usr
_ssl _ssl.c \
-DUSE_SSL -I$(SSL)/include -I$(SSL)/include/openssl \
-L$(SSL)/lib -lssl -lcrypto
# make altinstall
(3) Python-3.5.1インストール
※(2)と同じ手順で実行。(警告が多数出力されたので、まともにインストールされたかは不明。今回は2.7を使うので一応放置。)
(4) pipのインストール
# curl -kL https://bootstrap.pypa.io/get-pip.py | /usr/local/bin/python2.7
# curl -kL https://bootstrap.pypa.io/get-pip.py | /usr/local/bin/python3.5(失敗!放置)
/usr/local/bin/python3.5: error while loading shared libraries: libpython3.5m.so.1.0: cannot open shared object file: No such file or directory
(5) VirtualEnv をインストール
# /usr/local/bin/pip2.7 install virtualenv
# /usr/local/bin/pip3.5 install virtualenv (失敗!放置)
(6) デフォルトでPython2.7を起動
# ln -s /usr/local/lib/libpython2.7.so /usr/lib
# ln -s /usr/local/lib/libpython2.7.so.1.0 /usr/lib
# /sbin/ldconfig -v
# ln -s /usr/local/bin/python2.7 /usr/local/bin/python
sudoでもPython2.7が実行できるように…。
Defalts secure_pathに/usr/local/binを追加。
# visudo
#Defaults secure_path = /sbin:/bin:/usr/sbin:/usr/bin
Defaults secure_path = /usr/local/bin:/sbin:/bin:/usr/sbin:/usr/bin
(7) Python2.7の起動確認
# python
Python 2.7.9 (default, Jan 10 2016, 15:16:39)
[GCC 4.4.7 20120313 (Red Hat 4.4.7-16)] on linux2
Type “help”, “copyright”, “credits” or “license” for more information.
>>> exit()
成功!(しかし、後述にあるようにvirtualenvはPython2.7では動作していなかった。)
(8) 先にインストールしたletsencryptを削除(ちょっとハマる!)
Python2.7がデフォルトで起動しても、letsencryptをインストールすると、相変わらず例の警告がでる。メッセージを読むと、
/root/.local/share/letsencrypt/bin/python2.6 …………
とあるので、どうやら、ルート直下に隠しディレクトリ(./local/)が作成されそこにpython2.6に関するファイル群が格納されているようだ。つまり、最初何も考えずいきなりletsencryptをインストールしたので、最初デフォルトのpython2.6関連ファイル群がインストールされたままになっていたのである。
速攻削除!
# rm -rf /root/.local/
これで、letsencryptをインストールできる。
2.letsencryptクライアントをインストール
(1) gitインストール
# yum install git
(2) Let’s Encryptリポジトリのクローン
/usr/localにインストールする。
#cd /usr/local
#git clone https://github.com/letsencrypt/letsencrypt
(3) Let’s Encrypt クライアントが依存するパッケージをインストール
#cd letsencrypt/
#./letsencrypt-auto --help
(4) 証明書等の取得
サーバ証明書や中間証明書、秘密鍵を取得します。
# ./letsencrypt-auto certonly --webroot \
 -w /usr/local/shigi/shigizemi -d shigizemi.com -d www.shigizemi.com \
 -w /usr/local/shigi/shigidtpc -d pc.shigizemi.com\
 -m shigi-info@shigizemi.com\
 --agree-tos
-w:ドキュメントルートのパス
-d:ドメイン名
-m:メールアドレス(連絡用)
なお、バーチャルホストで運用しているのでドキュメントルートは2つwww.shigizemi.com用とpc.shigizemi.com用をセットしている。
Updating letsencrypt and virtual environment dependencies......
 Requesting root privileges to run with virtualenv: /root/.local/share/letsencrypt
/bin/letsencrypt certonly --webroot -w /usr/local/shigi/shigizemi -d shigizemi.com -d
www.shigizemi.com -w /usr/local/shigi/shigidtpc -d pc.shigizemi.com
 -m shigi-info@shigizemi.com --agree-tos
 Version: 1.1-20080819
 Version: 1.1-20080819
コマンド実行後、上記内容が表示され約1時間待たされた後、下記のように証明書へのパスが表示されました。
IMPORTANT NOTES:
– Congratulations! Your certificate and chain have been saved at
/etc/letsencrypt/live/shigizemi.com/fullchain.pem. Your cert will
expire on 2016-04-09. To obtain a new version of the certificate in
the future, simply run Let’s Encrypt again.
– If you like Let’s Encrypt, please consider supporting our work by:
Donating to ISRG / Let’s Encrypt: https://letsencrypt.org/donate
Donating to EFF: https://eff.org/donate-le
パスの中を見てみる。
# ls -la /etc/letsencrypt/live/shigizemi.com/
合計 8
drwxr-xr-x 2 root root 4096 1月 10 16:14 2016 .
drwx—— 3 root root 4096 1月 10 16:14 2016 ..
lrwxrwxrwx 1 root root 37 1月 10 16:14 2016 cert.pem -> ../../archive/shigizemi.com/cert1.pem
lrwxrwxrwx 1 root root 38 1月 10 16:14 2016 chain.pem -> ../../archive/shigizemi.com/chain1.pem
lrwxrwxrwx 1 root root 42 1月 10 16:14 2016 fullchain.pem -> ../../archive/shigizemi.com/fullchain1.pem
lrwxrwxrwx 1 root root 40 1月 10 16:14 2016 privkey.pem -> ../../archive/shigizemi.com/privkey1.pem
cert.pemがサーバ証明書、chain.penが中間証明書、privkey.pemが秘密鍵です。
3.ssl_confファイルの設定
(1) www.shigizemi.comのssl_confファイルを編集
##
## SSL Virtual Host Context
##
<VirtualHost *:443>
# General setup for the virtual host, inherited from global configuration
DocumentRoot /usr/local/shigi/shigizemi
ServerName www.shigizemi.com:443
……….
………..
# Server Certificate:
SSLCertificateFile /etc/letsencrypt/live/shigizemi.com/cert.pem
# Server Private Key:
SSLCertificateKeyFile /etc/letsencrypt/live/shigizemi.com/privkey.pem
# Server Certificate Chain:
SSLCertificateChainFile /etc/letsencrypt/live/shigizemi.com/chain.pem
(2) pc.shigizemi.comのssl_confファイルの編集
##
## SSL Virtual Host Context
##
<VirtualHost *:443>
# General setup for the virtual host, inherited from global configuration
DocumentRoot /usr/local/shigi/shigidtpc
ServerName pc.shigizemi.com:443
……….
………..
# Server Certificate:
SSLCertificateFile /etc/letsencrypt/live/shigizemi.com/cert.pem
# Server Private Key:
SSLCertificateKeyFile /etc/letsencrypt/live/shigizemi.com/privkey.pem
# Server Certificate Chain:
SSLCertificateChainFile /etc/letsencrypt/live/shigizemi.com/chain.pem
これは、超便利!
公開鍵や秘密鍵の作成や申請手続きもなく全自動で完了。しかも、ssl_confファイルへの設定も同じものが使える。超楽ちん!
-

- https://www.shigizemi.com
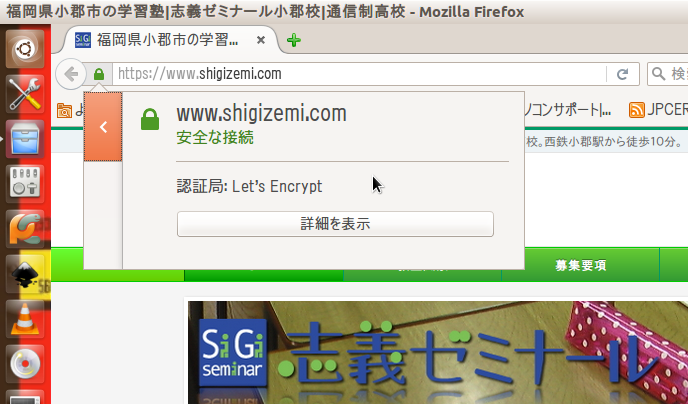
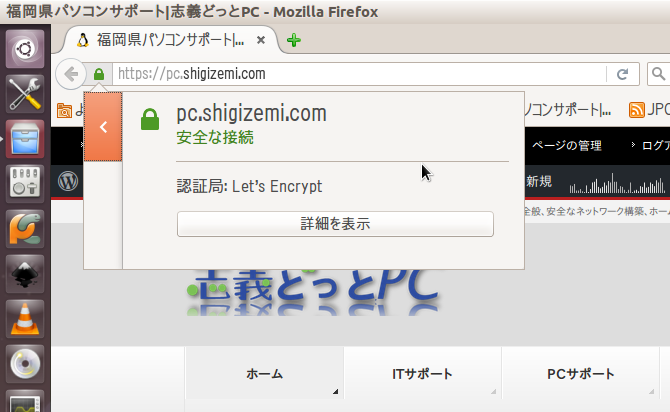
-
- https://pc.shigizemi.com
4.letsencryptの自動更新設定
Let’s Encryptの有効期限は90日間なので、更新を忘れそうです。そこで、ちゃんと自動更新コマンドも用意されてるのです。いたれりつくせりです。感謝!!!!
#vi /etc/crontab
03 05 01 * * root /usr/local/letsencrypt/letsencrypt-auto certonly --webroot \
 -w /usr/local/shigi/shigizemi -d shigizemi.com -d www.shigizemi.com \
 -w /usr/local/shigi/shigidtpc -d pc.shigizemi.com --renew-by-default \
 && /etc/init.d/httpd reload
毎月1日の朝5時3分に証明書が更新されApacheがリロードされます。(しかし、きちんと動作しません。もう少し調べてみます。)
<調べた結果>
crontabが実行されるとrootに送信されるメールを見ると下記のようになっていました。
Bootstrapping dependencies for RedHat-based OSes…
……………
……………
Creating virtual environment…
/usr/local/bin/python3.5: error while loading shared libraries: libpython3.5m.so.1.0: cannot open shared object file: No such file or directory
上記のメッセージをさらに調べて、私なりに解釈したこと。
「Bootstrapping dependencies for RedHat-based OSes…」は、virtualenvが正常に呼び出されていない時に表示され、それに対応した何がしかの処理を実行するような感じです。(参照:127行目付近)
参考:https://github.com/letsencrypt/letsencrypt/blob/master/letsencrypt-auto
また、その下の「Creating virtual environment…/usr/local/bin/python3.5:」は、virtualenvの実行にpython3.5のモジュールを利用できんというように読み取れます。
以上のことから、virtualenvがpython2.7のvirtualenvとしてきちんと動作していないと考えられます。
試しに、
# virtualenv venv
を実行してvenvが利用できるか確認すると、python3.5を利用できないという上記同様のメッセージが表示されました。本来はpython2.7で動作して欲しい。
5.(番外)virtualenvをpython2.7に
virtualenvがpython2.7できちんと動作するように対処します。
ポイントは、virtualenvをアンインストールして再度インストールし直しました。
# pip uninstall virtualenv
# curl https://bootstrap.pypa.io/ez_setup.py -o - | python
# easy_install pip
# pip install --upgrade virtualenv
venvがpython2.7で実行されているか確認します。
# virtualenv venv
# . venv/bin/activate
# python -v
で、python2.7が表示されたので無事に手当が完了しました。
ここで、crontabの時間を今(例10:30)から5分後くらいに書き直し、サーバ証明書が更新されるか確認します。
残念、何も変化なし。上記に示したのと同じメッセージがメールで送られてきました。
そこで、再度python2.7で実行されるように次のコマンドを実行して様子をみました。
# curl -kL https://bootstrap.pypa.io/get-pip.py | /usr/local/bin/python2.7
# /usr/local/bin/pip2.7 install –upgrade virtualenv
もうすでにアップデート済というメッセージが表示されました。crontabを再度書き換えて(時刻は10:50くらい)待ちました。
# vi /etc/crontab
…….省略
……….省略
50 10 * * * root /usr/local/letsencrypt/letsencrypt-auto …………….省略
保存して、待ちます。
お〜!やった〜!!!Congratulations!メッセージが来たぞ!
Updating letsencrypt and virtual environment dependencies......
 Requesting root privileges to run with virtualenv: //.local/share/letsencrypt/bin
/letsencrypt certonly --webroot -w /usr/local/shigi/shigizemi -d shigizemi.com -d www.shigizemi.com -w /usr/local/shigi/shigidtpc -d pc.shigizemi.com
 --renew-by-default
 Version: 1.1-20080819
 Version: 1.1-20080819
 IMPORTANT NOTES:
 - Congratulations! Your certificate and chain have been saved at
 /etc/letsencrypt/live/shigizemi.com/fullchain.pem. Your cert will
 expire on 2016-04-10. To obtain a new version of the certificate in
 the future, simply run Let's Encrypt again.
 - If you like Let's Encrypt, please consider supporting our work by:
Donating to ISRG / Let's Encrypt: https://letsencrypt.org/donate
 Donating to EFF: https://eff.org/donate-le
httpd を再読み込み中:
rootからのメールを受信し、ちゃんとサーバ証明が更新されたことを確認できました。
<<どうでもよいかもPython3.5の後始末>>
Python3.5はちゃんとインストールされていないようなので、削除しました。
# updatedb
# locate python3
locateで表示されたディレクトリやファイル群をrm -rfで削除しまくりました。tarで解凍してインストールしたのでmake uninstallができたら良かったのですが、ターゲットがなかばいと叱られたけん、ひとつひとつ調べて削除です。
今のところ、Python3の必要性はないのでインストールはしないでおきます。


 =志義ゼミナール小郡校(パソコン事業部)=" />
Let’s Encryptのサイトシールはまだ発行されていないようです。コミュニティでも少し取り上げられていますが、おそらく法的な問題をクリアーしてから発行の方向へ進むようだ。とりあえず、今回はテキストで対応したが、
Let’s Encryptのサイトのロゴだけでも貼り付けたいな。